Starting Your Own Mineral Collection: A Comprehensive Guide for Beginners and Young Collectors
by admin
Whether you’re captivated by the sparkle of crystals or discovering a new passion for Earth’s treasures, mineral collecting offers an enriching journey into geology, natural history, and the fascinating world beneath our feet. Starting a mineral collection is more accessible than you might think—it doesn’t require expensive equipment or extensive knowledge to begin. This guide will walk you through everything you need to know to launch your collecting adventure.
Why Collect Minerals?
Mineral collecting is far more than just accumulating pretty rocks. For young collectors, it introduces fundamental concepts in earth science, chemistry, and physics while developing crucial life skills. Children who collect minerals learn categorizing and sorting abilities, pattern recognition, and observation skills that form the foundation for scientific thinking. The hobby teaches patience, organizational skills, and responsibility as collectors learn to care for and document their specimens.
Beyond childhood benefits, mineral collecting connects people of all ages to Earth’s geological history. Each specimen represents millions of years—crystallized slowly in volcanic chambers, formed under intense pressure deep underground, or precipitated from mineral-rich solutions in ancient seas. The hobby fosters environmental awareness and appreciation for natural processes like volcanic activity, erosion, and plate tectonics.
Many professional mineralogists trace their careers back to pockets full of rocks as children—a simple fascination that blossomed into lifelong passion and scientific expertise. One notable mineralogist began collecting at age six when a parent took them to a geology museum, leading eventually to a PhD in mineralogy and geochemistry and a career living out childhood dreams as a research mineralogist.
Essential Minerals for Beginners
Starting with the right minerals makes your collecting journey more enjoyable and educational. These five specimens form an ideal foundation for any beginner collection:
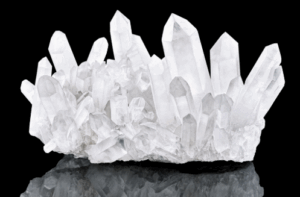
Quartz stands as the essential starting point for new collectors. As one of Earth’s most abundant minerals, quartz appears in countless varieties and colors, making it affordable, durable (hardness 7 on the Mohs scale), and easy to identify. Popular varieties include purple amethyst, pink rose quartz, brown smoky quartz, and clear rock crystal. Its six-sided prismatic crystals are visually appealing and can be found almost everywhere—from Brazil and Arkansas to Madagascar and Morocco.
Calcite offers fascinating diversity despite being common. This mineral demonstrates interesting optical properties and forms in various crystal shapes and colors. Its relative softness (hardness 3) makes it easy to identify through simple scratch tests, and it fizzes when exposed to vinegar or diluted acid—a fun demonstration of chemical reactions.
Pyrite, famously known as “Fool’s Gold,” captivates collectors with its metallic luster and brass-yellow color. This sulfide mineral often forms perfect cubic crystals or intriguing sun-shaped formations. It’s excellent for teaching the difference between metallic and non-metallic luster, and its distinctive characteristics make identification straightforward for beginners.
Fluorite becomes a collector’s favorite for its spectacular range of colors—green, blue, purple, and color-zoned specimens that show multiple hues in a single crystal. Despite being relatively common, fluorite creates stunning displays and many collectors eventually dedicate entire collections to this single mineral species. Some fluorite specimens even fluoresce under ultraviolet light, adding an extra dimension of fascination.
Selenite (a form of gypsum) offers beautiful clarity despite its softness (hardness 2). Selenite towers and blades are inexpensive and create eye-catching displays. Its soft, pearly appearance and unique crystal habit make it easily recognizable and perfect for beginners.
Additional affordable and beginner-friendly minerals include azurite (bright blue), malachite (vibrant green), kyanite, aragonite, and various garnet specimens. Starting with 3-5 special pieces that genuinely appeal to you is better than rushing to fill a shelf. As your knowledge grows, you’ll learn when to invest in rarer formations, closed-mine specimens, or unique inclusions.
Where to Find Minerals
One of the joys of mineral collecting is that opportunities exist everywhere, from your own backyard to specialized mining sites.
Free and Low-Cost Collecting
Start close to home by exploring your immediate area. Your own backyard or neighborhood may yield interesting specimens, especially if you live near geological features. Stream beds and areas of erosion often reveal unusual rocks and minerals as water naturally exposes and polishes specimens. Beaches and shorelines provide excellent hunting grounds for agates, jasper, sea glass, and smooth river rocks, particularly after storms when new material gets exposed. Rivers and streams contain gravel bars where heavier minerals settle, and inside bends accumulate quartz crystals, river agates, and garnets.
Mountains and hills offer exposed rock faces where erosion reveals fresh specimens. Construction sites and quarries (with permission and extreme caution) sometimes allow collecting, though safety must always be the top priority. Always check ownership and obtain proper permission before collecting on any property.
Pay-to-Dig Sites
Commercial mining operations across the United States welcome rockhounds for a fee, offering guaranteed collecting opportunities:
Crater of Diamonds State Park in Arkansas stands unique as the only public diamond mine in North America, where visitors can keep what they find. Beyond diamonds, collectors discover amethyst, agate, jasper, garnet, phlogopite, quartz, baryte, and calcite—approximately 40 different minerals in total.
Crystal Grove Diamond Mine in New York specializes in Herkimer diamonds—brilliantly clear quartz crystals that are fun to mine and highly prized for their gem-like clarity. The Morefield Mine in Amelia, Virginia offers unique experiences for children and adults alike, while the Royal Peacock Opal Mine in Virgin Valley, Nevada provides access to fire-opal-rich banks, though daily digging fees run higher.
California’s Himalaya Tourmaline Mine near Lake Henshaw allows visitors to screen through ore from this world-famous location, potentially finding pink and green tourmaline, black tourmaline, quartz crystals, spessertine garnet, lepidolite, and clevelandite.
Purchasing Specimens
Science museum gift shops provide excellent starting points for purchasing inexpensive but quality specimens. Local rock shops offer affordable pieces for small specimens, perfect for building initial collections. Rock and mineral shows occur throughout the year in various locations, providing opportunities to see displays, meet dealers, and find good deals.
Essential Tools and Equipment
Starting mineral collecting requires minimal investment in tools, with costs scaling as your involvement deepens.
Field Collecting Basics
For beginners venturing into the field, essential tools include a rock hammer or geology pick (with one blunt end and one pick end for breaking and trimming specimens), safety goggles and gloves (mandatory for eye protection from flying chips), a backpack or collecting bag for carrying specimens, and a field notebook with pen for recording locations and dates. Recommended additions include a hand lens or 10x magnifying glass for examining crystal structures, a GPS device or smartphone for marking locations, a spray bottle with water for cleaning specimens in the field, and newspaper or bubble wrap for protecting finds during transport.
Identification Tools
Proper identification requires specific equipment. A streak plate (unglazed porcelain tile) reveals a mineral’s true color when scratched across the surface—hematite may appear metallic silver but leaves a reddish-brown streak. Hardness testing utilizes the Mohs scale, employing common objects: fingernails (hardness 2.5), copper pennies (3.5), steel nails (5.5), and glass plates (5.5). A small magnet identifies magnetic minerals like magnetite, while dilute hydrochloric acid detects carbonate minerals that fizz on contact (use with adult supervision and proper safety equipment).
Rock Tumbling Equipment
Rock tumbling transforms rough stones into polished gems through a month-long process that teaches patience and rewards careful attention. A basic rotary tumbler costs $50-100 and requires silicon carbide grit in four grades (coarse, medium, fine, and polish), ceramic media or plastic pellets to fill barrel space, and water. The process involves filling the barrel 1/2 to 2/3 full with rocks, adding two tablespoons of grit per pound of rock, adding water to just below rock level, and running each stage for 7-8 days with thorough cleaning between stages.
Best results come from tumbling jaspers and agates, quartz family stones, and rocks with Mohs hardness between 5-7, while avoiding specimens with cracks, pits, or fissures. The “Golden Rule” of tumbling states that nothing should leave Stage 1 (coarse grit) with any cracks, fissures, pits, or flaws—fixing problems early prevents disappointment later.
Learning to Identify Minerals
Understanding how to identify minerals transforms random rocks into educational specimens. Identification relies on observing and testing specific physical properties.
Color and Luster
Color provides the first clue but can be misleading since many minerals display multiple colors due to impurities. Quartz appears colorless, purple (amethyst), pink (rose quartz), or smoky, illustrating why color alone isn’t reliable for identification. Always use color as a supportive clue rather than the main criterion.
Luster describes how light reflects from a mineral’s surface. Metallic luster appears shiny like metal (pyrite), vitreous luster looks glassy (quartz), pearly luster resembles the inside of a shell (talc), and dull or earthy luster shows no shine (kaolinite). Identifying luster quickly separates metallic minerals from non-metallic ones.
Hardness Testing
The Mohs Hardness Scale ranks minerals from 1 (talc, very soft) to 10 (diamond, hardest known mineral). Simple tests determine hardness: if a fingernail scratches it, hardness is 2 or less (gypsum); if a copper coin scratches it, hardness is 3 (calcite); if a knife scratches it, hardness is 4 (fluorite); if it scratches glass, hardness is 5 or greater (quartz). This quick test helps narrow identification possibilities significantly.
Additional Properties
Cleavage describes how minerals break along smooth, flat surfaces following their crystal structure. Some minerals like mica show perfect cleavage in one direction, splitting into thin sheets, while others like quartz show conchoidal fracture, breaking with curved, shell-like surfaces. Specific gravity measures how heavy a mineral feels compared to water. Heft a specimen—if it feels unusually heavy for its size, it likely contains dense metallic elements.
Identification Process
Follow this systematic approach: First, observe color and luster to determine if the mineral is metallic or non-metallic. Second, check hardness by testing against reference materials. Third, perform a streak test and record the streak color. Fourth, examine cleavage or fracture patterns. Fifth, test reaction with dilute acid (fizzing indicates carbonates). Sixth, estimate density by feeling the specimen’s weight. Finally, compare all observations with field guides or reference materials.
For children, stations-based learning works exceptionally well. Set up four stations testing luster, streak, hardness, and magnetism, allowing hands-on exploration of mineral properties. Using flowcharts guides young collectors through systematic identification, building critical thinking skills while making the process feel like solving a puzzle.
Organizing and Documenting Your Collection
A well-organized collection with proper documentation transforms an accumulation of rocks into a valuable scientific and educational resource.
Initial Organization
Organization begins with your first specimen. Upon acquiring a new mineral, identify it by determining whether it’s igneous, sedimentary, or metamorphic rock, then narrow down to specific mineral types. Label immediately using an index card noting the mineral’s common name, rock type, location found, and date collected. Never let specimens sit unlabeled—memory fades quickly, and unlabeled specimens lose much of their value.
Cataloging Systems
“A collection without a catalog is just an accumulation.” Your catalog records valuable information about each specimen, educating others unfamiliar with your collection about what minerals occur at specific locations and preserving knowledge about mines that may become inaccessible. As temporary caretakers of specimens that existed long before us and will exist long after, collectors have a responsibility to pass complete information to future owners.
Minimum information includes mineral species and location of origin. Ideally, record the mineral’s name and chemical formula, specific locality (country, state, mine), date collected or obtained, how acquired (collected, purchased, traded, inherited), from whom acquired, previous history or provenance, estimated value for significant specimens, catalog number, and physical dimensions.
Two main labeling systems exist: attaching a small label directly with each specimen (easiest for beginners) or placing a number on the specimen that corresponds to a separate catalog database. Sequential numbering (1, 2, 3…) works for most collectors, with letters added for variations (2162-A, 2162-B). Multiple specimens from the same location obtained simultaneously can share one number. There’s no single “right” system—choose what works for you and maintain consistency.
Modern collectors benefit from digital tools that offer free cataloging for up to 365 specimens with fields for all relevant data and public/private display options. Traditional methods using notebooks or spreadsheets work equally well if maintained diligently.
Storage and Display
Display minerals on firm shelves or in sturdy cabinets to prevent falling furniture and dropped specimens. Keep minerals away from bedrooms and food preparation areas. Cardboard specimen trays in various sizes (2×2″, 3×2″, 4×3″) provide affordable storage that protects specimens while keeping them accessible. Plastic display boxes with compartments work well for smaller specimens. Tool cabinets with ball-bearing drawers designed for heavy loads handle larger collections, with shallow drawers accommodating most miniature to small cabinet-size specimens.
Organize by geographic area, specific mine, or mineral type depending on your collection focus. Some collectors arrange by color for visual impact, while others group by crystal system or chemical composition. Display larger statement pieces throughout your home on bookshelves, coffee tables, and dedicated stands.
Cleaning and Caring for Specimens
Proper cleaning preserves specimens while revealing their natural beauty.
Basic Cleaning
The safest starting point involves water with dish soap. Soak specimens in soapy water for 24-48 hours to loosen packed dirt, then use an old toothbrush or soft brush to scrub gently. Rinse thoroughly and dry completely. This simple method works effectively for many specimens without risk of damage.
Enhanced water cleaning adds vinegar to the mixture: Place rocks in a sealable container, fill halfway with water and halfway with vinegar, add a squeeze of dish soap, then swirl or shake every couple hours. After 24-48 hours, dump and rinse thoroughly for sparkly clean results.
Different specimens may require different methods of cleaning, and some types of cleaning can change or affect the specimen. Always be sure what the specimen is before trying to clean it. Always wash hands after handling rocks and minerals.
Field Collection Care
Specimen care begins at the moment of collection. Wrap specimens carefully in newspaper or bubble wrap to prevent damage during transport. Keep lesser-quality examples for testing cleaning and preparation methods rather than discarding them—they’re invaluable for learning what works without risking prize specimens.
Ethics and Environmental Responsibility
Responsible collecting ensures sites remain accessible and pristine for future generations while protecting sensitive ecosystems.
Leave No Trace Principles
Core principles adapted for rockhounding include thorough planning and preparation—research regulations, permits, and restrictions before visiting any site. Travel on durable surfaces by sticking to established trails whenever possible, avoiding trampling vegetation or disturbing fragile soils. Pack out all waste including food scraps, wrappers, and even biodegradable items that can attract wildlife. Leave areas as you found them or better by filling excavation holes and removing any trash you encounter.
The principle “Leave What You Find” requires context for rock collectors. Surface collecting of loose rocks on public lands where permitted represents minimal environmental impact—rocks naturally erode and billions are moved daily in normal commerce. However, archaeological artifacts including arrowheads, pot shards, and historic items are protected by federal law and must never be removed from public lands. In sensitive ecosystems like delicate river beds or areas prone to erosion, extra care prevents habitat disruption.
Legal and Ethical Guidelines
Always obtain permission before collecting on private property. Observe all posted signs and respect boundaries. Check regulations before collecting on public lands—national parks typically prohibit collecting, while many Bureau of Land Management areas allow casual surface collecting. Report significant scientific finds to professionals rather than keeping rare fossils or unusual mineral discoveries that could advance scientific knowledge.
A cautionary tale illustrates the importance of responsible collecting: Cycad National Monument in the Black Hills, designated in 1922, had no regulations protecting fossils. Within five years, visitors completely stripped the location of specimens. The park closed in 1957, and irreplaceable historical links to dinosaur science vanished forever. This history reminds collectors that individual responsibility protects sites for future generations.
Rockhound’s Code of Ethics
Respect both private and public property, never entering private land without explicit permission. Leave all collecting areas clean and do not litter. Fill in excavations completely when finished. Never contaminate wells, creeks, rivers, ponds, or lakes with cleaning materials or waste. Don’t dig around tree roots or in unstable areas. Leave some specimens for the next collector to discover. Practice the ethic: “If everyone did what I’m doing right now, would the world be better or worse?” This question helps maintain accountability and prevents the tragedy of stripped collecting sites.
Building Knowledge and Community
Mineral collecting flourishes within a supportive community of fellow enthusiasts.
Educational Resources
Begin with quality reference books. “A Field Guide to Rocks and Minerals” by Frederick H. Pough (Peterson’s Field Guide series) provides clear, comprehensive information suitable for beginners and experienced collectors. For broader geological understanding, “Earth: Portrait of a Planet” by Marshak serves as the most popular introductory geology textbook with extensive color photos and diagrams covering landscapes, minerals, and geological processes.
Young collectors benefit from “Rock Collecting for Kids” by Dan R. Lynch, which includes geology basics, identification guides to 75 common specimens with full-color photos, and practical “how to” sections covering what to look for, where to search, and safety considerations. John Sinkankas’ “Field Collecting Gemstones & Minerals” offers detailed information for those ready to advance beyond basics.
Free online resources include physical geology textbooks available through open educational repositories. Mindat.org provides the world’s largest open database with millions of mineral photos and detailed information contributed by registered users. This invaluable resource allows searching by properties, localities, and chemical composition while providing comprehensive information on each mineral species.
Technology Tools
Smartphone apps offer convenient field identification support, though they should supplement rather than replace proper learning. Popular apps like Rock Identifier: Stone ID (available on Android and iOS) feature databases of thousands of rock types, offline functionality, and collection management allowing users to save photos, notes, and GPS locations. Other options provide AI-powered identification with educational modules perfect for students and hobbyists.
Important caveat: identification apps can be inaccurate. Use them as quick references and learning aids, but verify identifications through reference books and community expertise. Apps work best when you already understand basic mineral properties and can recognize obviously incorrect suggestions.
Joining the Community
Local rock and mineral clubs provide the single best resource for beginning collectors. Clubs organize field trips to proven collecting sites, offer educational programs and workshops, host swap meets where members trade specimens, and connect beginners with experienced mentors willing to share knowledge. The camaraderie and shared passion make collecting more enjoyable while accelerating learning through others’ experience.
Rock and mineral shows occur year-round in various locations, offering opportunities to view impressive collections, meet dealers, learn about new localities, and purchase specimens at competitive prices. Many shows feature educational exhibits, demonstrations of lapidary techniques, and lectures by expert collectors and mineralogists.
Online communities complement local involvement. Mindat’s message board hosts knowledgeable discussants who generously share expertise. Rock Tumbling Hobby forums maintain active discussions covering everything from stone identification to preparation techniques. Reddit communities including r/rockhounds, r/mineralcollectors, and r/geology provide quick identification help and opportunities to share finds. Facebook groups offer easy access to community support and answers to beginner questions.
Museums provide inspiration and education through quality displays. Visiting institutions like the Cranbrook Institute of Science, A.E. Seaman Mineral Museum, Smithsonian National Museum of Natural History, or local science museums shows examples of exceptional specimens while teaching proper identification and appreciation for geological diversity.
Budget Considerations
Mineral collecting accommodates any budget, from completely free to significant investment.
Starting requires minimal expense—you can begin with $50-200 and build an impressive collection of beautiful specimens including fluorite, quartz varieties, and calcite. Small pieces in local rock shops cost $2-5, perfect for determining if the hobby resonates before making larger investments. Science museum gift shops, rock shows, and online marketplaces offer specimens at all price points.
Free collecting opportunities abound. Surface collecting in your neighborhood, on beaches, along streams, and in publicly accessible areas costs nothing beyond time and effort. Many collectors never spend money on specimens, finding all their treasures through field collecting. “Collect Rocks Day” events held at children’s museums, libraries, and parks distribute free specimens to young collectors.
As knowledge and passion grow, investment naturally increases. Moving from common $10 specimens to rare $100 pieces elevates collection quality. The advice to “buy the best possible minerals within your budget” means purchasing one excellent $100 specimen rather than ten mediocre $10 specimens—those quality pieces retain value and appreciation while lower-grade specimens often get culled from collections over time.
Consider collection as a long-term investment in learning rather than monetary value. Some specimens do appreciate significantly, particularly from closed mines or featuring exceptional crystal formation. However, the primary returns come through knowledge gained, connections made, and joy experienced in the pursuit and appreciation of Earth’s geological wonders.
Safety Considerations
Safety awareness ensures collecting remains enjoyable without injury.
Field Safety
The greatest dangers in collecting come not from specimens but from collecting activities themselves. Driving to and from sites—often early morning or when fatigued—poses significant risk. At collecting locations, unstable ground causes rock falls, sprained ankles result from uneven terrain, and tools can injure when misused. Lightning strikes threaten collectors in exposed mountain areas. Bug bites, tick encounters, poison ivy exposure, and heat exhaustion are common field hazards requiring prevention and preparation.
Always collect with a companion or notify someone of your location and expected return time. Wear steel-toed boots when hammering or working around heavy rocks. Safety goggles are absolutely mandatory when breaking rocks—flying chips can cause serious eye injuries. Never enter moving water, which can sweep even adults away, and stay clear of cliffs and unstable rock piles that may collapse.
Specimen Safety
Most minerals pose no danger when properly handled and stored. However, certain specimens require special precautions, particularly for children. Safe minerals for kids include quartz varieties, calcite, fluorite, and most common specimens with supervision. Potentially dangerous minerals that should be avoided or handled only with adult supervision include galena (lead ore), chalcanthite (copper sulfate that’s too bioavailable), mercury minerals, radioactive specimens, and asbestos-containing minerals.
General safety rules include never keeping minerals in bedrooms or near food areas, never storing specimens near children’s unsupervised play areas, displaying collections on firm shelves or in secured cabinets to prevent falls, and handling all specimens carefully and only occasionally rather than constantly. For young collectors, maturity level determines appropriate supervision—the key question is whether a child might put specimens in their mouth.
The greatest risk with specimens themselves comes from dropping heavy cabinet-size pieces on feet or legs. Use proper lifting techniques and stable display furniture to prevent accidents.
Getting Started: Your Action Plan
Transform interest into action with these concrete first steps:
Week 1-2: Learn and Explore
Read beginner resources to understand basic mineral properties and identification methods. Visit online mineral databases to familiarize yourself with the materials and browse photos. Watch educational videos on mineral collecting and identification. Most importantly, look around your immediate environment—what rocks and stones exist in your area? Start noticing geological features during daily activities.
Week 3-4: Acquire Your First Specimens
Visit your local science museum gift shop or rock shop to purchase 3-5 beginner specimens from the recommended list (quartz, calcite, pyrite, fluorite, selenite). Hold them, examine them, practice identification techniques. Go for walks specifically looking for interesting rocks—beaches, streams, construction sites (with permission). Start with what’s free and accessible before spending significant money.
Month 2: Join the Community
Research local rock and mineral clubs using online directories and attend a meeting. The connections and knowledge gained from experienced collectors prove invaluable. Look for upcoming rock and mineral shows in your area and attend to see quality specimens and meet dealers. Join online communities to ask questions and share finds.
Month 3: Organize and Document
Establish your cataloging system from the beginning rather than trying to recreate information later. Create labels for all specimens with name, location, and date. Set up simple storage using cardboard trays or plastic containers. Take photos of each specimen for digital records. Consider creating a free cataloging account to practice electronic documentation.
Ongoing: Build Knowledge and Collection
Continue learning through books, websites, and community interactions. Attend field trips organized by local clubs to proven collecting sites. Visit museums to see exceptional examples and understand what makes specimens valuable. Gradually expand your collection based on developing interests—you might focus on minerals from specific locations, particular mineral families, or crystals with certain properties. Trade duplicates with other collectors. Most importantly, collect what genuinely appeals to you rather than trying to build someone else’s ideal collection.
The Journey Ahead
Starting a mineral collection opens a lifetime of discovery, learning, and connection with our planet’s geological heritage. Every specimen represents millions of years of Earth’s history—crystallized slowly in volcanic chambers, formed under intense pressure deep underground, or precipitated from mineral-rich solutions in ancient seas. As you hold a quartz crystal or examine the geometric perfection of pyrite cubes, you’re connecting directly with geological processes that shaped our world.
The hobby scales beautifully from casual appreciation to serious scientific study. Some collectors remain content with a small display of beautiful specimens, while others develop encyclopedic knowledge of specific mineral families or localities. Young collectors often carry their passion into adulthood, with childhood collections serving as foundations for careers in geology, mineralogy, or earth sciences. The skills developed—observation, classification, documentation, research—transfer to countless other pursuits.
Beyond personal enrichment, collectors serve as stewards of geological knowledge. By properly documenting specimens, especially those from mines that close or localities that become inaccessible, collectors preserve information valuable to science and future generations. Sharing knowledge with new collectors, teaching children about Earth’s processes, and practicing ethical collecting all contribute to the broader community and protect sites for those who follow.
The treasures are beneath your feet, waiting to be discovered. Whether you’re a young person picking up your first shiny rock or an adult embarking on a new passion, the world of mineral collecting welcomes you. Start simply, learn continuously, connect with community, and collect what captures your imagination. Your collection will grow to reflect your unique interests and journey, becoming not just an accumulation of specimens but a personal museum of Earth’s wonders and your own story of discovery.
You may also interested in:
Cincinnati Quartz
The Many Faces of Quartz in Greater Cincinnati: Variations, Inclusions, and Spiritual Significance Quartz is one of the world’s most abundant and beloved minerals, and in the greater Cincinnati area—including
Cincinnati Crystals, Minerals and Fossils are Local Treasures
Crystals, Minerals, and Fossils of Greater Cincinnati: A Comprehensive Guide to Earth’s Ancient Treasures The greater Cincinnati region stands as one of North America’s premier destinations for rockhounding, fossil collecting,
What Exactly do I have - Dolomite, Limestone or Dolostone?
The other night, I was discussing Eddie Murphy with a friend. Murphy, whose career has been up and down over the past 10 years had a bit of a comeback
An Unusual Jade Gift
Jade is a beautiful and highly desirable material. It’s valued for the fabulous and magnificent works of art that are created from it, and for the deeper meanings people attach